How to Connect Kilo Code to Lunos in 5 Steps
A step-by-step tutorial showing how to connect Kilo Code to Lunos in under five minutes. One API key, one billing statement, full control over your AI coding agent's model usage.
You've got Kilo Code installed. You've got a Lunos API key. Now you want to point your AI coding agent at Lunos so all your model usage flows through one unified gateway: one key, one billing statement, one place to rotate credentials when things inevitably change.
Good news: it takes about five minutes. Let's walk through every click.
Wait: Why Kilo Code + Lunos?
Before the screenshots, let's quickly answer why this combo makes sense.
Kilo Code is a VS Code extension that drops an agentic coding assistant right into your editor. Think file edits, terminal commands, multi-step reasoning. It's the kind of tool that makes you forget you ever wrote boilerplate by hand.
Lunos is a unified AI gateway. Instead of hardcoding different base URLs and API keys for every AI provider (OpenAI here, Anthropic there, custom model somewhere else), you get a single endpoint at https://api.lunos.tech/v1 that speaks OpenAI-compatible HTTP. One key to rule them all.
Together? You get Kilo Code's powerful coding UX with Lunos's clean, centralized control over what models you use and what you spend.
Now let's build it.
Prerequisites
Before you start, make sure you have:
- ✅ Kilo Code installed in VS Code
- ✅ A Lunos API key (grab one from your Lunos dashboard)
- ✅ The Lunos base URL:
https://api.lunos.tech/v1
That's it. No new dependencies, no Docker containers, no config files to hand-edit.
Step 1: Open Kilo Code Settings
Fire up VS Code and open the Kilo Code panel. Look for the settings button. It's the small gear or settings icon inside the Kilo Code interface.
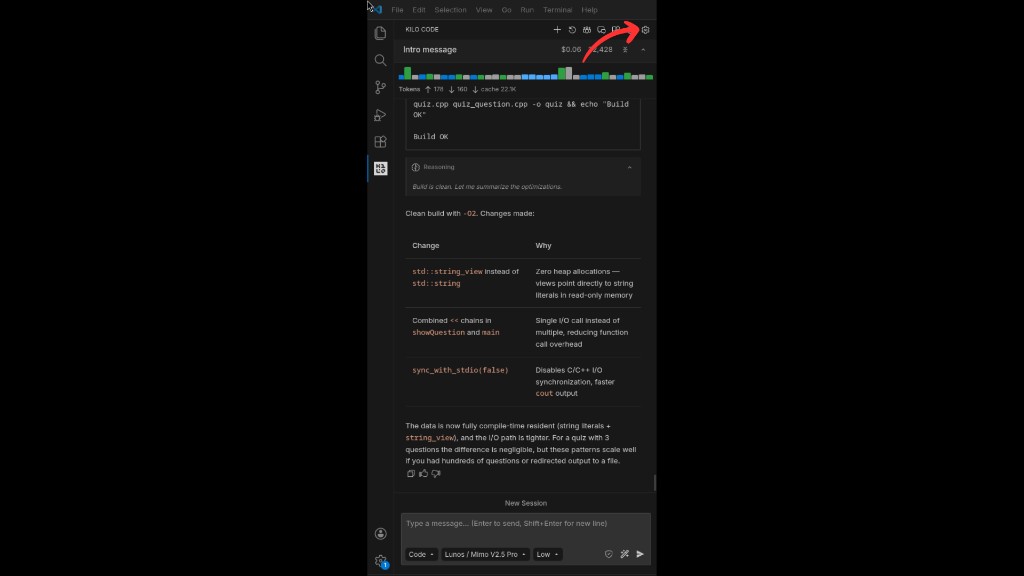
Quick tip: If you can't find the panel, open the VS Code Command Palette (Cmd+Shift+P / Ctrl+Shift+P) and search for "Kilo Code".
Step 2: Navigate to Providers → Custom Provider
In the settings sidebar, click on Providers. You'll see a list of popular providers. Scroll until you find Custom provider (OpenAI-compatible) and click Connect.
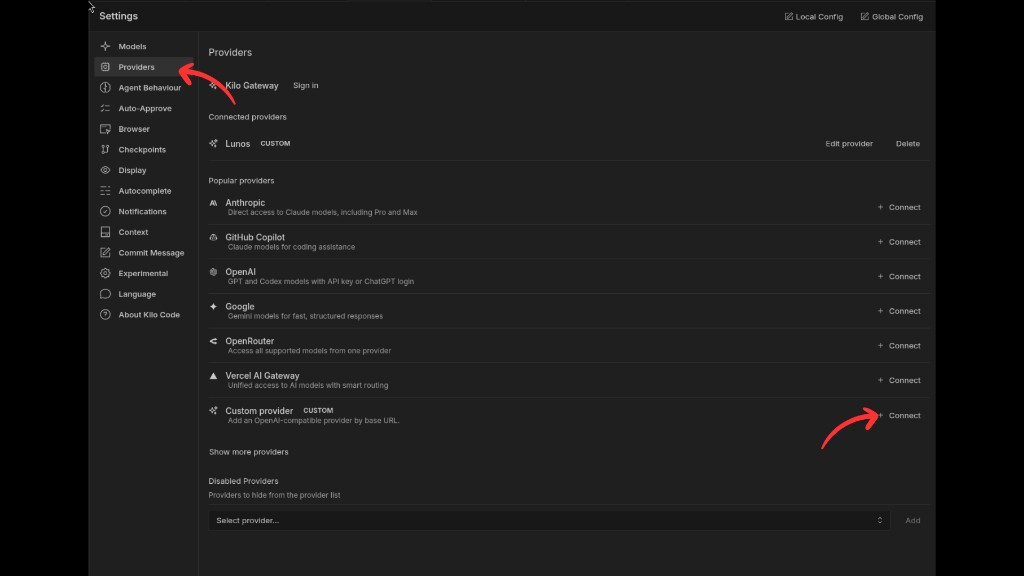
This launches the provider setup wizard. It's where the magic happens.
The reason you're choosing the OpenAI-compatible custom provider is that Lunos speaks that protocol natively. Your requests go in as standard OpenAI-style calls; Lunos routes them to the right model behind the scenes.
Step 3: Fill In Your Provider Details
Now you're on the Edit Provider screen. Fill in these four fields:
| Field | Value |
|---|---|
| Provider ID | lunos-0 (or any unique ID you like) |
| Display Name | Lunos |
| Base URL | https://api.lunos.tech/v1 |
| API Key | Your Lunos API key |
Two things to double-check here:
- The trailing
/v1in the Base URL is not optional. Kilo Code needs it for OpenAI-compatible routing. Skip it and you'll get confusing 404s that'll waste your afternoon. - Your API key stays local. It never leaves your machine except as a request header to Lunos. Still, don't commit it to git.
Once you're happy with the details, continue to the next screen.
Step 4: Select Your Models (and Optionally Add a Header)
This is where you pick which Lunos models appear in your Kilo Code model picker. You can hit Select All to grab everything, or hand-pick the models your workflow needs.
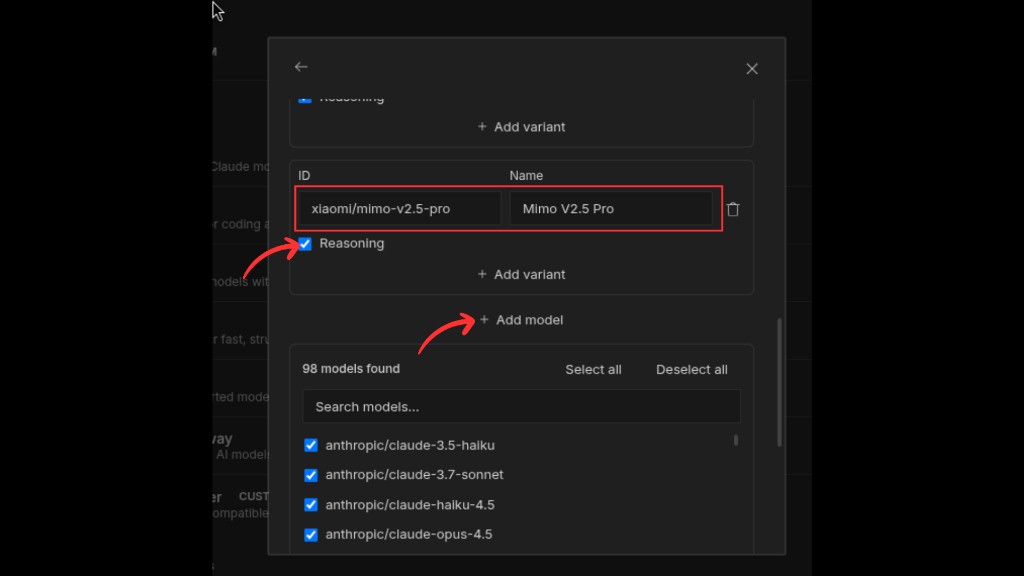
If you want clean usage tracking in your Lunos dashboard (and you do, trust us) open the Headers (optional) section and add:
| Key | Value |
|---|---|
x-app-id |
Kilo |
This optional header tags your requests so usage from Kilo Code shows up separately from other tools hitting the same Lunos key. When your team lead asks "what's consuming most of our tokens?", you'll have a clean answer.
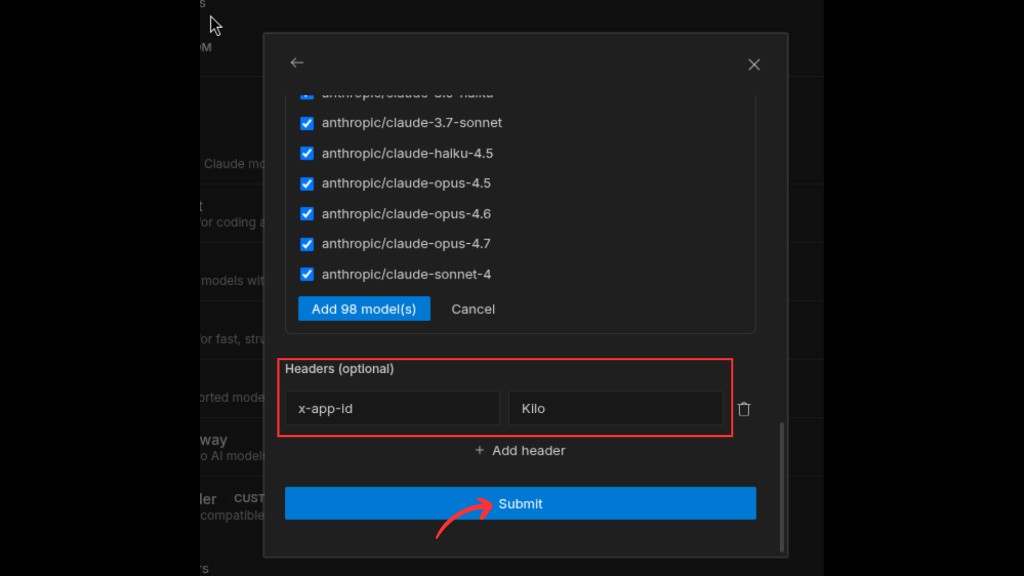
Hit Submit to save the provider. Done. Lunos is now wired in.
Step 5: Pick Lunos in the Model Picker
Open the model picker inside Kilo Code's chat. You should now see Lunos as a provider. Select it, then choose whichever model you want to use for your current task.
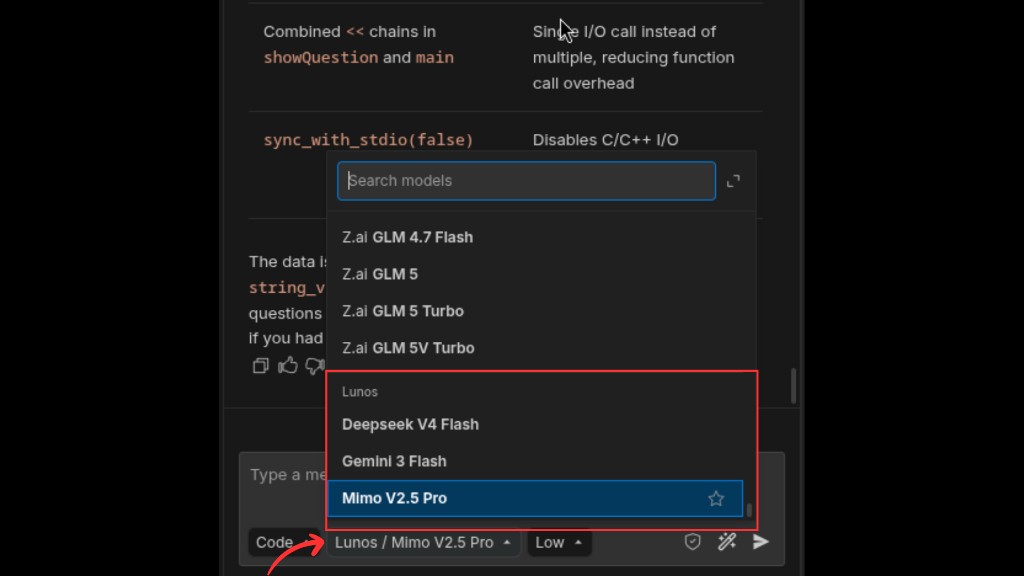
Start a chat, ask it to refactor a function, generate tests. You're now running through Lunos. Every token, every request, tracked in one place.
Troubleshooting: When Things Don't Work
Let's be real: sometimes things just don't work on the first try. Here's the short list of fixes:
Getting a 401 or 403 (Auth error)?
Your API key is wrong, expired, or has a typo. Go to your Lunos dashboard, copy it fresh, and paste again. Also verify the x-app-id header value exactly matches what you set. Casing matters.
Provider connects but requests fail?
Almost always the base URL. Confirm it's https://api.lunos.tech/v1 with the /v1 suffix. No trailing slash after v1.
Model not found?
The model ID you selected might have been deprecated or you may have a typo. Check your Lunos dashboard model list and pick an active model.
A Word on Security
Since we're talking about API keys woven into a coding tool:
- Never commit API keys to repositories. Use environment variables or a secrets manager.
- Use separate Lunos keys per environment. Dev, staging, and prod should each have their own key. This way, if one leaks, the blast radius is contained.
- Rotate keys regularly. Lunos's dashboard makes this easy, and Kilo Code lets you update the provider config in seconds.
You're Live. What Now?
You've got a fully functional Kilo Code + Lunos setup. A few things worth exploring next:
- Lunos Model List — Browse available models to find the best fit for different task types (coding vs. reasoning vs. fast completions).
- Observability docs — Turn on structured logging for deeper insight into what your agent is doing.
- Tool & Function Calling — Not all models support tool use. Check here before expecting agentic multi-step tasks to work.
- Other integrations — If you're also running Claude Code, Cline, or n8n, you can wire them all through the same Lunos key.
The goal is simple: one gateway, every tool, full visibility. This tutorial is step one. Go ship something.
Have questions or ran into a step that didn't match what you see? Reach out at hello@lunos.tech. We read every message.